Spinner Evolution Launch Power, Speed, Durability Tier List
Situation-based S/A/B ranks so your next coin stack fixes the real limiter.
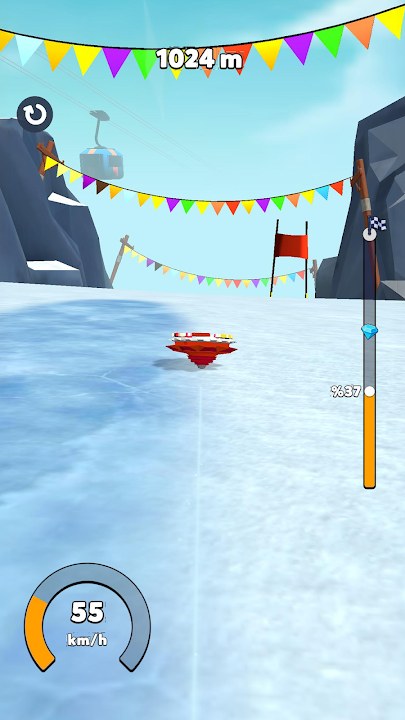
Spinner Evolution lists Launch Power, Speed, Durability, and broader Overall performance as the upgrade pillars. This tier list ranks them by situation—not as a single eternal ladder—because the best buy on Farm is not always the best buy on Jungle smash walls. Use it with the Upgrade Planner, Getting Started, Distance Records, and form timing in How to Evolve.
How to read these tiers
- S — Highest priority in that situation; buy here first with coins.
- A — Strong support; buy once the S gap is closed.
- B — Situational or filler; fine later, weak as a panic buy.
- Overall — Treated as a glue stat: valuable when cores are close, wasteful when one core is clearly broken.
Tiers assume competent aim and release. If launches are random, no S-tier shop row saves you—fix Controls first.
Global ranking (default mid-game)
For a balanced player pushing mid-ladder records:
| Rank | Stat | Why |
|---|---|---|
| S | Speed | Converts clean opens into meters and stronger impacts |
| S | Launch Power | Still foundational; soft opens waste every other investment |
| A | Durability | Critical whenever smash density rises |
| B | Overall | Best as catch-up glue, not a primary identity |
Launch Power and Speed share S because neglecting either caps distance. If you must split hairs on a single coin pile, pick the one matching your last fail tag.
Tier list by situation
Early Farm / first hour
| Rank | Stat |
|---|---|
| S | Launch Power |
| A | Speed |
| B | Durability |
| B | Overall |
You need repeatable opens before smash walls matter. Durability rises only if a specific Farm prop already hard-stops you.
Soft-start epidemic (any stage)
| Rank | Stat |
|---|---|
| S | Launch Power |
| A | Speed |
| B | Durability |
| B | Overall |
Do not buy Durability to fix a weak gate exit. Also verify release timing before dumping gems.
Mid-run fade / chasing PBs with clean opens
| Rank | Stat |
|---|---|
| S | Speed |
| A | Launch Power |
| A | Durability |
| B | Overall |
Speed is the distance multiplier. Keep Launch Power from lagging so opens stay honest. Add Durability if fades are actually mini-smashes you mis-tagged.
Smash-stop / Jungle density / Toy piles
| Rank | Stat |
|---|---|
| S | Durability |
| A | Speed |
| A | Launch Power |
| B | Overall |
Durability turns fatal crates into breakable props. Speed still helps impact force; Launch Power keeps you arriving with energy to spend.
Pre-evolution gem banking week
| Rank | Stat |
|---|---|
| S | Whatever your fail tag says (usually Speed or Durability) |
| A | Launch Power (maintenance) |
| B | Overall |
| Special | Gems — bank for the gate |
Coins still go into the real limiter. Gems wait for How to Evolve costs unless a coin-impossible upgrade blocks all play.
Space / Snow late ladder
| Rank | Stat |
|---|---|
| S | Launch Power |
| S | Durability |
| A | Speed |
| B | Overall |
Late biomes punish soft opens and fatal impacts. Speed remains important but often sits just behind “don’t die at the start or first wall.” Balance beats a glass cannon Speed stack.
After a fresh evolution
| Rank | Stat |
|---|---|
| S | Re-diagnose (often Durability or Launch Power retune) |
| A | Speed |
| B | Overall until bounce feel is re-learned |
New forms can change impact feel. Take scout runs before trusting old ranks blindly.
Stat deep dives
Launch Power — the open
Launch Power decides whether the run begins as a surge or a stumble. It is S-tier whenever opens look weak or late stages delete soft starts. It falls to A only when opens are already boringly consistent and smash/fade problems dominate.
Invest more when: first seconds look limp; Space/Snow unlock; you changed devices and timing slipped.
Invest less when: five identical strong opens still die to the same mid-map wall—that is Durability/Speed work.
Speed — the meter farmer
Speed stretches successful launches into records and feeds smash force. Default S for PB hunting on stages you already survive.
Invest more when: opens are clean but distance plateaus; coin lines on the main path are easy.
Invest less when: you die at the first dense cluster every try—buy Durability, then return.
Durability — the permission slip
Durability allows the aggressive lines that Speed wants. Without it, “optimal” coin routes are fantasies.
Invest more when: Jungle/Toy/Beach smash stops repeat; glancing strategies still fail.
Invest less when: you rarely hit anything and simply coast to a soft fade—that is Speed.
Overall — the glue
Overall (or broad performance upgrades) smooths a balanced spinner. It is B-tier as a primary plan and A-tier only when Launch, Speed, and Durability are within a close band and you need a general bump before a PB block.
Never buy Overall to ignore an obvious soft start.
Sample spend paths
Path A — New player (Farm): Launch Power → Launch Power → Speed → Speed → Launch Power → Speed → light Durability if needed.
Path B — Jungle wall: Durability → Durability → Speed → Launch maintenance → Durability until the wall breaks → Speed for PBs.
Path C — Late ladder: Launch Power check → Durability check → Speed fill → Overall only if all three feel close → evolve when gated.
Full checklists: Upgrade Planner. Environment context: Unlock Levels.
Anti-meta traps
- Speed-only identity on smash-heavy maps.
- Durability stacking while opens still limp.
- Overall every time because the name sounds complete.
- Gem dumping into B-tier buys before evolution.
- Copying someone else’s endgame split while you are still on Farm timing drills.
Keeping the list honest after patches
When Updates ship new levels or balance notes, re-run three tagged attempts and rebuild the situation table. Jungle drops historically raise Durability’s stock; open scenic stages may favor Speed again. The S/A/B labels should follow your fail tags, not loyalty to an old screenshot of this page.
Master the situation ranks and every coin has a job. For execution order and gem/IAP notes, return to the Upgrade Planner; for the broader hub, see the Tier List.
Frequently Asked Questions
Quick answers to the most common Spinner Evolution questions.
What is the best stat in Spinner Evolution?
It depends. Launch Power for soft starts, Speed for clean-open distance, Durability for smash walls. Overall is glue when the three cores are already close.
Is Speed always S tier?
Speed is S for many PB pushes, but Durability or Launch Power take S when smash stops or weak opens are the real limiter.
When should I buy Overall upgrades?
When Launch Power, Speed, and Durability are nearly even and you want a general bump. Skip Overall if one core stat clearly fails your runs.
Does evolution change the tier list?
Forms can change bounce feel. After evolving, scout again and re-rank by the new fail tags instead of forcing your old split.
Where should I spend next if I am unsure?
Tag three to five runs, then follow the matching situation table—or use the step-by-step Upgrade Planner.