Spinner Evolution Upgrade Priority Tier List
S-tier is situational: spend on the stat that is ending your runs, not the one that looks biggest on paper.
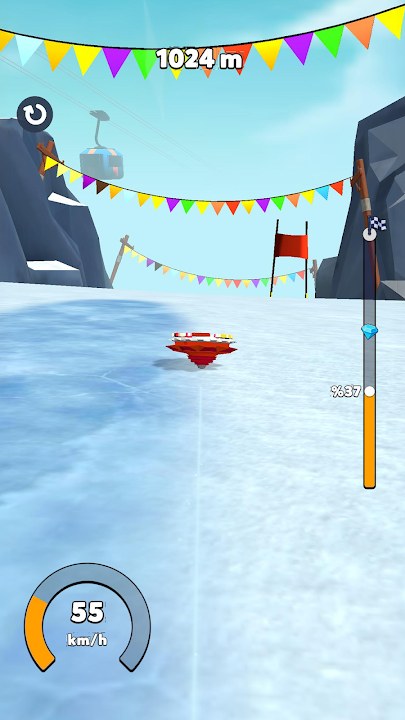
This Tier List Hub ranks Spinner Evolution upgrade priorities—not characters from another genre. HyperMonk’s loop is simple: launch, build speed, smash obstacles, collect coins and gems, then improve Launch Power, Speed, Durability, and Overall performance before evolving into stronger forms. A fixed S–F list that never changes is wrong for this game. The correct S-tier pick is whatever statistic is currently your limiting factor.
Use this page with the Upgrade Planner, then apply the plan on your next Farm-to-Snow runs. For form unlocks after big clears, see How to Evolve and the Spinner Forms Hub.
How to read this tier list
Think in questions after every failed or short run:
- Did the spinner leave the ramp weakly? → Launch Power
- Did you start well but bleed momentum on open ground? → Speed
- Did obstacles or rough terrain kill the run early? → Durability
- Are two stats fine but the third lagging with no clear culprit? → Overall (or the cheapest gap filler)
S-tier means buy this next, not always best forever. When the bottleneck moves, the tier list moves with it.
S-tier: situational by limiting factor
| Situation | S-tier upgrade | Why |
|---|---|---|
| Soft or mistimed starts | Launch Power | Opens the run; bad launches waste every other stat |
| Clean path, low distance | Speed | Converts good launches into meters |
| Smash-heavy segments | Durability | Keeps rolling after impacts |
| Balanced but stuck on a gate | Overall or cheapest underleveled stat | Removes the silent weak link |
If two problems appear at once, fix the one that ends runs earliest. A durability brick at 200m matters more than a theoretical speed gain at 800m you never reach.
Launch Power tier notes
When it rises to S: Early game, new device sensitivity, or after unlocking a level where the opening angle feels different.
When it drops: Once launches feel repeatable and runs die mid-course instead of at the ramp.
Play tips: Pair Launch Power spends with practice from Controls. Buying power without learning release timing still produces inconsistent personal bests. See Getting Started for the first-hour spend order.
Speed tier notes
When it rises to S: You clear the opening cleanly but distance plateaus on relatively open stretches (classic Farm and some Beach segments).
When it drops: Obstacles are deleting momentum faster than speed can help—stack Durability first.
Play tips: Speed shines when you maintain a favorable line. Use Distance Records to judge whether you are losing meters to coasting or to impacts.
Durability tier notes
When it rises to S: Jungle clutter, Toy smash toys, Space hazards, or Snow terrain that punishes glancing hits.
When it drops: You rarely break on contact and instead run out of path length with leftover “health” feel.
Play tips: Durability is not an excuse to aim at every object. Break through when the line is honest; upgrade before forcing a wall that ends three runs in a row. Unlock Levels calls out which environments lean smash-heavy.
Overall performance tier notes
Treat Overall as a flex slot. It is S-tier when:
- Launch, Speed, and Durability are close in level and you need a general bump before a level gate
- The UI offers a strong value pack relative to specializing further
- You are preparing for evolution and want no single dump stat
It is lower priority when one named statistic is clearly ending runs. Dumping coins into Overall while Launch Power is still trash rarely feels good.
Sample priority paths
Early Farm (learn the loop)
- Launch Power until starts feel consistent
- Speed for first distance jumps
- Light Durability before you spam smash attempts
- Reassess with the planner
Jungle / Toy smash pressure
- Durability to survive clutter
- Launch Power if new layout resets your timing
- Speed once you can finish segments intact
Beach / open glide segments
- Speed and path discipline
- Durability for intermittent obstacles
- Overall if stats are even before a gate
Space / Snow late environments
- Identify the new failure mode on a scouting run (see Updates for when those levels landed)
- Raise the failing stat to S for a few buys
- Rebalance before forcing evolution spends
Common tier-list mistakes
- Always maxing Speed because distance is the score — ignores early deaths.
- Ignoring Launch Power after the tutorial — new levels change the feel.
- Buying every upgrade the moment it lights up — small taps can strand you without a meaningful spike.
- Chasing fake codes instead of upgrades — read the Codes Hub; there are no verified official codes to shortcut this list.
- Evolving with a dump stat — stronger forms still inherit bad priorities; fix the limiter first via How to Evolve.
How to use this hub with tools and forms
- Diagnose the limiter after two or three intentional runs.
- Open the Upgrade Planner and mark S / A / B for this session.
- Spend a focused coin chunk, then test on the same level.
- When a clear grants a new spinner design, review Spinner Forms and keep unspent diamonds intentional.
- After patches, re-tier for new terrain instead of copying an old Farm plan.
Related reading
Remember: in Spinner Evolution, S-tier is a diagnosis, not a celebrity ranking. Rank the problem, buy the fix, then re-rank.
Frequently Asked Questions
Quick answers to the most common Spinner Evolution questions.
What is S-tier in Spinner Evolution?
Whatever upgrade currently limits your distance—Launch Power for weak starts, Speed for lost momentum, Durability for obstacle deaths, or Overall when stats are even.
Should I always upgrade Speed first?
No. Speed is excellent on open paths, but if obstacles end runs early, Durability or Launch Power should jump to S-tier until that failure mode disappears.
Does this tier list rank spinner forms?
This hub ranks upgrade stats. For evolution forms and designs, use the Spinner Forms Hub and the How to Evolve guide.
How do I apply the list in-game?
Diagnose your last runs, mark priorities in the Upgrade Planner, spend a focused batch of coins, then retest on the same level before changing the plan.
Do codes change the tier list?
There are no verified official promo codes right now. Even if codes appear later, spend rewards on your limiting factor—the tier logic stays the same.